

MADE IN THE USA
with American products
w/ American products


When installing a garage pergola during a remodel, the most important scheduling decision often comes before the pergola itself is ready to go up. New siding may conceal areas that need preparation, masonry work may change the finished wall surface, and a replacement garage door or new exterior lighting may affect the intended placement. Rather than treating installation as simply a before-or-after decision, homeowners should coordinate the eyebrow pergola around specific construction milestones. Here's how to establish those dependencies, identify what each trade needs to know, and determine when the project is ready for final installation.
 The best time to select an eyebrow pergola is generally during exterior design coordination, before the project team completes any wall work that could conceal necessary preparation. Selecting the kit early does not mean installing it early. It means giving the remodeling team enough information to incorporate the pergola into the construction schedule.
This distinction is particularly important when replacing siding, modifying a garage opening, updating exterior trim, or changing the façade around the proposed pergola location.
Start by identifying the approximate location, width, color, and appearance of the intended eyebrow pergola. These decisions establish the design reference that the remodeling team can use when reviewing drawings and planning work around the garage.
Sunset Pergola Kits offers eyebrow pergola kits designed for permanent attachment to a house or other structure. The kits feature premium extruded vinyl exteriors, aluminum-reinforced rafters, and fixed shade purlins.
Available configurations include:
These details matter during remodeling because the pergola's length, projection, and appearance affect how it relates to the garage opening, exterior trim, lighting, and surrounding architectural features.
Once a likely configuration has been identified, obtain the current kit information and drawings needed for coordination. Do not assume that a photograph or approximate product description provides everything the construction team needs.
Before hidden preparation proceeds, the project team should have:
Confirm actual delivery timing rather than assuming the kit will arrive at a particular construction milestone. Product selection, ordering, delivery, and physical installation are separate scheduling decisions.
The early-selection milestone is complete when the project team has enough verified information to coordinate preparation—not when every finished dimension has necessarily been finalized.
One of the most consequential scheduling mistakes is waiting until the exterior wall is finished before determining whether preparation was needed behind it.
Because an eyebrow pergola is permanently attached to the building, the project team must establish how its attachment requirements will be accommodated by the actual wall assembly. Any required concealed work should be identified while the relevant areas remain accessible.
 Have the project team review the intended pergola location against the existing or planned wall construction.
Depending on the building and project design, coordination may involve:
Not every remodel requires the same preparation. The relevant requirements depend on the building, the intended kit, and the project-specific construction details.
The important scheduling rule is to identify and complete required concealed preparation before the work becomes inaccessible, rather than assume it can be addressed without affecting completed finishes.
Preparation is easier to coordinate when responsibility is explicit.
For example, the general contractor may coordinate the overall sequence while the appropriate framing, exterior-finish, and other trades complete their assigned work. The project team should establish who confirms the preparation requirements, who performs the work, and who verifies that the next construction activity can proceed.
A useful handoff record should identify:
Where concealed work is involved, photographs and approved project records can help document the completed preparation for later coordination.
This approach reduces the chance that a siding or masonry crew finishes an area before another trade has completed the work that needed access to it.
A garage pergola does not always need to be installed before siding, and it does not always need to be installed afterward. The correct sequence depends on how the selected kit interfaces with the wall, which preparation must remain accessible, and how the exterior weather envelope will be completed.
The same principle applies to masonry, roofing, painting, and electrical work. Each activity may introduce a dependency, but not every activity necessarily prevents pergola installation.
Before the exterior schedule is finalized, review the following dependencies with the project team.
| Trade or activity | Information needed | Condition to confirm | Responsible sign-off |
|---|---|---|---|
| Framing and wall preparation | Intended kit location, applicable drawings, and identified structural preparation requirements. | Required concealed work is complete and any necessary inspection has been addressed before access closes. | General contractor and responsible framing or structural professional. |
| Siding and exterior wall finishes | Attachment-area location, preparation requirements, and planned wall assembly details. | Required preparation and weather-envelope interfaces are coordinated before the relevant finish work proceeds. | General contractor and exterior-finish contractor. |
| Masonry or veneer work | Proposed pergola position, anticipated finished wall geometry, and relevant attachment-area details. | Any necessary concealed preparation is complete, and finished surfaces are sufficiently established for final verification. | General contractor and masonry contractor. |
| Roofing, soffits, and fascia | Proposed pergola elevation and relationship to roof-edge components. | Any affected roof or soffit interfaces are coordinated, with necessary access and weather protection addressed. | General contractor and responsible roofing or exterior trade. |
| Exterior electrical and lighting | Proposed pergola footprint, mounting elevation, fixture locations, and electrical routing. | Required rough-in and fixture-location decisions are coordinated before finishes or installation restrict access. | General contractor and electrician. |
| Painting and finish work | Planned coating areas, work access, and surfaces that may require protection. | Relevant coatings and finishes are ready for the next activity under the applicable project requirements. | General contractor and painting or finishing contractor. |
| Garage-door and trim work | Final door-opening design, trim profiles, and intended pergola alignment. | Changes affecting finished dimensions or clearances are complete or reliably established before final approval. | General contractor and responsible garage-door or trim contractor. |
The exact responsible parties will vary by project. The important point is that each dependency has an identified owner and an agreed condition for releasing the next activity.
Replacing siding or adding masonry can change both access to the attachment area and the finished exterior surface.
For example, a remodeling team may need to complete concealed preparation before new siding is installed while coordinating the eventual pergola installation with the siding contractor's weatherproofing and finish details.
On another project, the approved construction sequence may require certain exterior components to be completed before the pergola is installed.
Neither example establishes a universal installation method. The project team must determine the appropriate sequence for the actual wall assembly and selected product.
The governing question is whether the next activity preserves the required preparation, weather-envelope continuity, and access for the remaining work.
Exterior lights, soffits, fascia, and nearby roof details can affect the visual and physical relationship between the pergola and the garage façade.
If new sconces, overhead lights, or other fixtures are planned, compare their intended locations with the pergola's proposed width, projection, and elevation.
Likewise, confirm whether roof-edge or soffit changes will alter the reference points used to position the pergola.
Electrical rough-in may need to occur early, even when final fixtures will be installed later. The electrician and project coordinator should agree on fixture positions and any required access before relevant finishes are completed.
This avoids treating lighting as an isolated finishing detail when it may affect the approved pergola layout.
Preliminary measurements help establish the design. Final measurements confirm whether that design still fits the finished conditions.
This distinction matters when a remodel includes garage-door replacement, new trim, masonry changes, soffit alterations, or other work that changes the visible geometry around the opening.
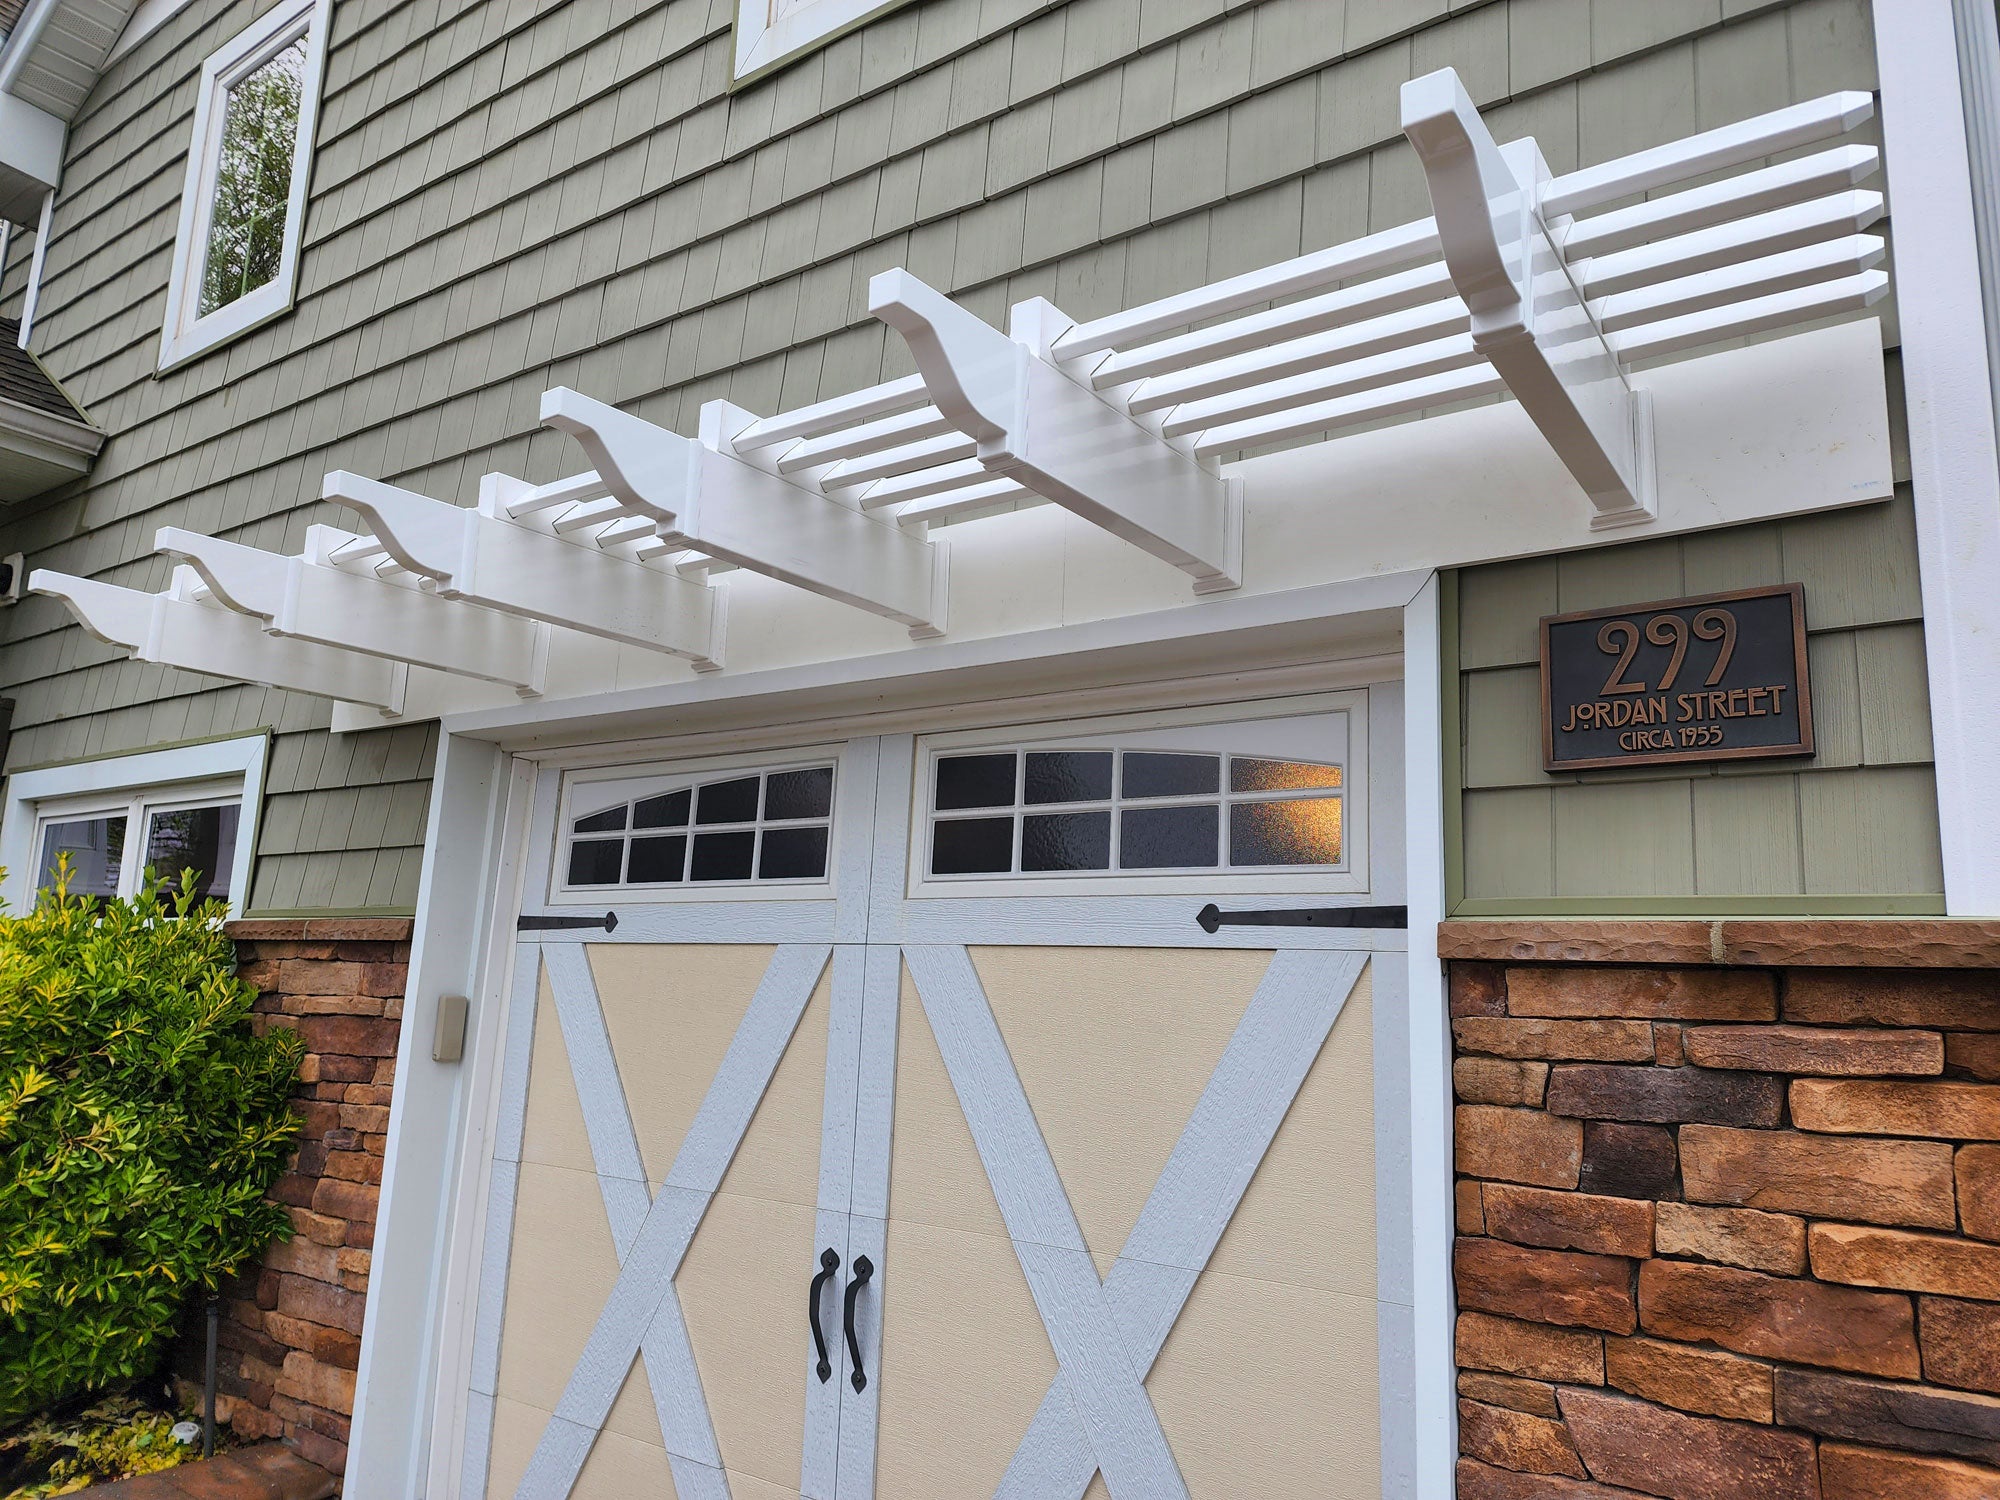 A garage pergola is often positioned to complement the garage opening and surrounding architecture. Even relatively modest design changes can affect the intended alignment.
Before approving the final installation milestone, confirm:
If garage-door trim is being replaced, measurements taken from the old trim should remain provisional until the new configuration is sufficiently established.
The same applies when masonry or other exterior finishes change the finished appearance or dimensions of the wall.
Changes to soffits, trim, garage-door details, or lighting can affect the intended pergola height.
The final elevation review should compare the current product information and approved design with the actual finished conditions. The project team should resolve any changes affecting clearances or architectural alignment before installation is released.
Do not rely solely on an early elevation measurement if the surrounding construction has changed.
Finished dimensions are only part of the final review. The project team should also determine whether relevant masonry, coatings, sealants, and other finishes are ready for the planned installation activity.
Where curing, drying, or other finish-readiness requirements apply, use the applicable product instructions and project specifications rather than an arbitrary waiting period.
Sunset Pergola Kits' eyebrow pergolas have premium extruded vinyl exteriors that do not require painting or staining. However, that does not eliminate scheduling considerations involving the home's painted trim, siding, masonry, or other finishes.
Before releasing installation, confirm that the remaining work can proceed without interfering with unfinished surfaces or creating avoidable damage to completed work.
The most reliable installation schedule is based on verified project milestones rather than a fixed calendar date established before the relevant construction conditions are known.
Use the following sequence as a coordination checklist. The individual milestones may overlap or occur in a different order when the approved project design requires it.
The sequence deliberately separates the early design decision from the eventual installation date. It also creates opportunities to catch changes before they affect completed work.
For new construction, eyebrow pergola coordination can begin while architectural drawings and exterior elevations are still being developed.
The builder can incorporate the intended pergola location into the planning process, identify necessary wall preparation, and coordinate relevant exterior trades before construction reaches those milestones.
Final measurements and installation readiness still need verification against the actual building conditions. Approved drawings are useful planning references, but they do not eliminate the need to confirm the finished geometry.
If the pergola is introduced after siding, masonry, or other exterior work has progressed, start by identifying which preparation and design decisions have already been closed.
Ask the project team to review:
A late addition does not automatically mean the project must be abandoned or that completed finishes must be disturbed. It does mean the team should reopen any dependencies that were originally established without the pergola in the plan.
Do not release installation merely because the kit is available or the remodeling crew has an opening in its schedule.
Even after a layout has been approved, changes can affect the installation milestone.
For example, a revised garage-door trim design may change the intended visual alignment. A relocated light may introduce a conflict with the pergola's proposed position. A change in the exterior wall assembly may require another review of preparation and weather-envelope coordination.
When such changes occur, identify the affected decision, return it to the responsible project-team member, and obtain updated approval before proceeding.
A useful installation release is a documented confirmation that the current conditions match the approved plan—not simply an acknowledgment that the original date has arrived.
The best time to install an eyebrow pergola during an exterior remodel depends on the project's actual construction sequence. Select the intended kit early enough to coordinate concealed preparation, then schedule physical installation when the necessary wall work, finished measurements, trade access, and finish conditions have been verified.
Before the relevant exterior work begins, review the available Eyebrow Pergola Kits and share the intended configuration and current product information with your remodeling team. That early coordination gives the team a practical basis for planning preparation and approving the final installation milestone.
Yes. Selecting the intended eyebrow pergola early allows the project team to coordinate its location, product requirements, and any necessary concealed preparation. The actual installation date can remain provisional until the required construction milestones and site conditions have been verified.
The kit does not necessarily need to arrive before siding work begins. However, the project team should have the current product information needed to identify and complete any required concealed preparation and coordinate the exterior weather-envelope details. Confirm the approved sequence before siding closes access to the relevant areas.
Yes. New garage-door trim can change the finished opening dimensions and visual reference points used to position the pergola. Final layout approval should reflect the completed or reliably established trim configuration rather than measurements based solely on the original opening.
No. Sunset Pergola Kits' eyebrow pergolas have premium extruded vinyl exteriors that do not require painting or staining, but the surrounding home may still require painting or other finish work. The project team should coordinate access, finish readiness, and protection of completed surfaces before installation.
Have the project team review the revised fixture location against the pergola's approved width, projection, and mounting elevation. If the change affects clearances, appearance, or required electrical work, update the relevant layout and trade approvals before releasing installation.
Yes. The same coordination principles apply, but new construction often allows the intended pergola to be incorporated into architectural planning before framing and exterior finishes begin. The builder should still verify concealed preparation, finished dimensions, weather-envelope coordination, and installation readiness at the appropriate milestones.
Recheck the pergola's horizontal placement, mounting elevation, relationship to garage-door trim and lighting, and any affected attachment preparation or exterior-finish interfaces. The responsible project-team members should approve necessary revisions before the installation milestone proceeds.


