

MADE IN THE USA
with American products
w/ American products


Choosing the right eyebrow pergola size isn't always as simple as matching the width of your garage door. What if the opening measures 9 feet wide, the surrounding trim adds several inches, and the available pergola lengths jump from 8 to 12 feet? The best choice depends on what you want to frame, how much horizontal wall space is available, and how the finished pergola will look against the home's architecture. This guide walks you through measuring those features, establishing a target length, and comparing the available sizes before ordering.
 Start by measuring the actual opening, its surrounding trim, and the horizontal wall area available for the pergola. These are three different measurements, and confusing them can lead to a pergola that looks too short, extends farther than intended, or conflicts visually with nearby architectural details.
The goal is to distinguish between the feature you want to accent and the maximum horizontal space available for the installation.
For a garage door, record the width of the door opening itself. Then measure from the outside edge of the trim on the left to the outside edge of the trim on the right.
These measurements may differ substantially, especially when the garage has wide decorative trim, pilasters, or other architectural detailing.
Use the same approach for an entrance or window:
For example, a garage opening might measure 9 feet wide while its outer decorative trim spans 10 feet. If the pergola is intended to frame the complete architectural feature, the 10-foot measurement is likely the more useful starting point.
Neither measurement automatically determines the correct pergola length. It establishes the reference against which the finished length will be evaluated.
Next, identify the usable wall area on both sides of the feature.
Measure from your chosen reference edges to nearby elements that could limit the pergola's length or affect its appearance, including:
Some of these features represent physical constraints, while others are primarily visual boundaries. Record which is which rather than treating every nearby feature as an absolute installation limit.
For a permanent wall-mounted structure, the available space also needs to be compatible with the manufacturer's attachment requirements. A visually open wall section does not, by itself, establish that every point along it is suitable for mounting.
A basic front-view drawing of the wall makes the sizing decision much easier.
Include:
Label measurements in feet and inches, and identify the exact points from which they were taken.
This sketch becomes the reference for comparing garage pergola dimensions. It also helps prevent a common mistake: selecting a length based only on the garage door's advertised size rather than the actual finished opening and surrounding architecture.
 An eyebrow pergola generally looks most intentional when its length relates clearly to a recognizable architectural feature. That feature might be the garage opening, the full decorative trim surround, an entrance, a window, or a larger section of exterior wall.
Before comparing product sizes, decide which of those elements should define the pergola's visual boundaries.
For a garage with minimal trim, the opening itself may provide a straightforward reference for sizing.
For a garage with substantial decorative trim, measuring only the door opening can produce a different result. A pergola that extends beyond the opening might still stop inside the outer edges of the trim, making it appear undersized relative to the complete feature.
Consider two possible approaches:
Neither approach is universally correct. The better choice depends on which architectural element appears to define the opening when viewed from the driveway or street.
Sometimes the intended accent is wider than the opening and its trim.
For example, an entrance might sit within a broad recessed section of exterior wall, or a window might be centered within a decorative masonry panel. In those situations, the larger wall feature may establish a more convincing visual boundary than the opening alone.
The important distinction is between the width of the feature and the width of the composition you want to create around it.
Choose one primary reference before selecting a length. Otherwise, you may find yourself comparing a pergola against the opening in one moment and against the entire wall in the next.
Once you've chosen the feature to frame, visualize the pergola's intended left and right endpoints.
These endpoints establish your target visual envelope: the horizontal area you want the pergola to occupy.
Ask yourself:
Record the preferred left and right endpoints on your sketch. The distance between them is your target pergola length.
This is a design target, not yet a confirmed order size. The next steps determine whether an available kit can achieve the intended proportions.
The difference between the selected pergola length and the width of the feature beneath it determines how much horizontal extension is available on each side.
That extension can strongly influence whether the finished installation appears balanced, undersized, or unnecessarily wide.
When the feature is centered beneath the pergola, the calculation is straightforward:
Side margin = (Pergola length − Feature width) ÷ 2
Consider a hypothetical garage with an outer trim envelope measuring 10 feet wide.
If the target pergola length is 12 feet:
(12 feet − 10 feet) ÷ 2 = 1 foot per side
The pergola would extend 12 inches beyond the trim on both the left and right.
This is an arithmetic example, not a recommended minimum extension or required installation clearance. Its purpose is to show how a proposed length translates into visible margins.
A 12-foot pergola centered over the same feature creates a different visual relationship than an 8-foot pergola, which would be 2 feet shorter than the trim envelope overall.
The shorter option might still be appropriate for a deliberately narrow accent, but it would not frame the full 10-foot trim surround.
Equal margins are often visually appealing, but they aren't always practical.
Suppose the same hypothetical 10-foot trim envelope has 18 inches of usable wall space on one side and substantially more on the other.
A centered 12-foot pergola would extend 12 inches beyond the trim on each side, fitting within those measured horizontal boundaries.
However, a longer pergola that requires more extension could exceed the available space on the constrained side.
Rather than automatically rejecting the longer length, evaluate whether an offset composition would look appropriate.
For example, a 12-foot pergola could theoretically be positioned with 6 inches of extension on one side and 18 inches on the other. The total extension would still equal 24 inches.
Whether that arrangement looks intentional depends on the surrounding architecture.
These examples address horizontal proportions only. They do not establish acceptable structural attachment locations or manufacturer-approved installation clearances.
Equal left and right margins are generally a useful starting point when the opening is centered within a symmetrical wall section.
They may be less important when the surrounding architecture is already asymmetrical.
For instance, a garage opening positioned close to a building corner may look more balanced with a pergola that responds to the larger wall composition rather than maintaining identical extensions beyond the trim.
The practical test is to compare the proposed endpoints against the entire visible wall, not just the opening.
If possible, mark the proposed left and right endpoints temporarily on the wall or on a photograph. Viewing the proposed span from the driveway or another normal viewing position can reveal proportion problems that are difficult to recognize from measurements alone.
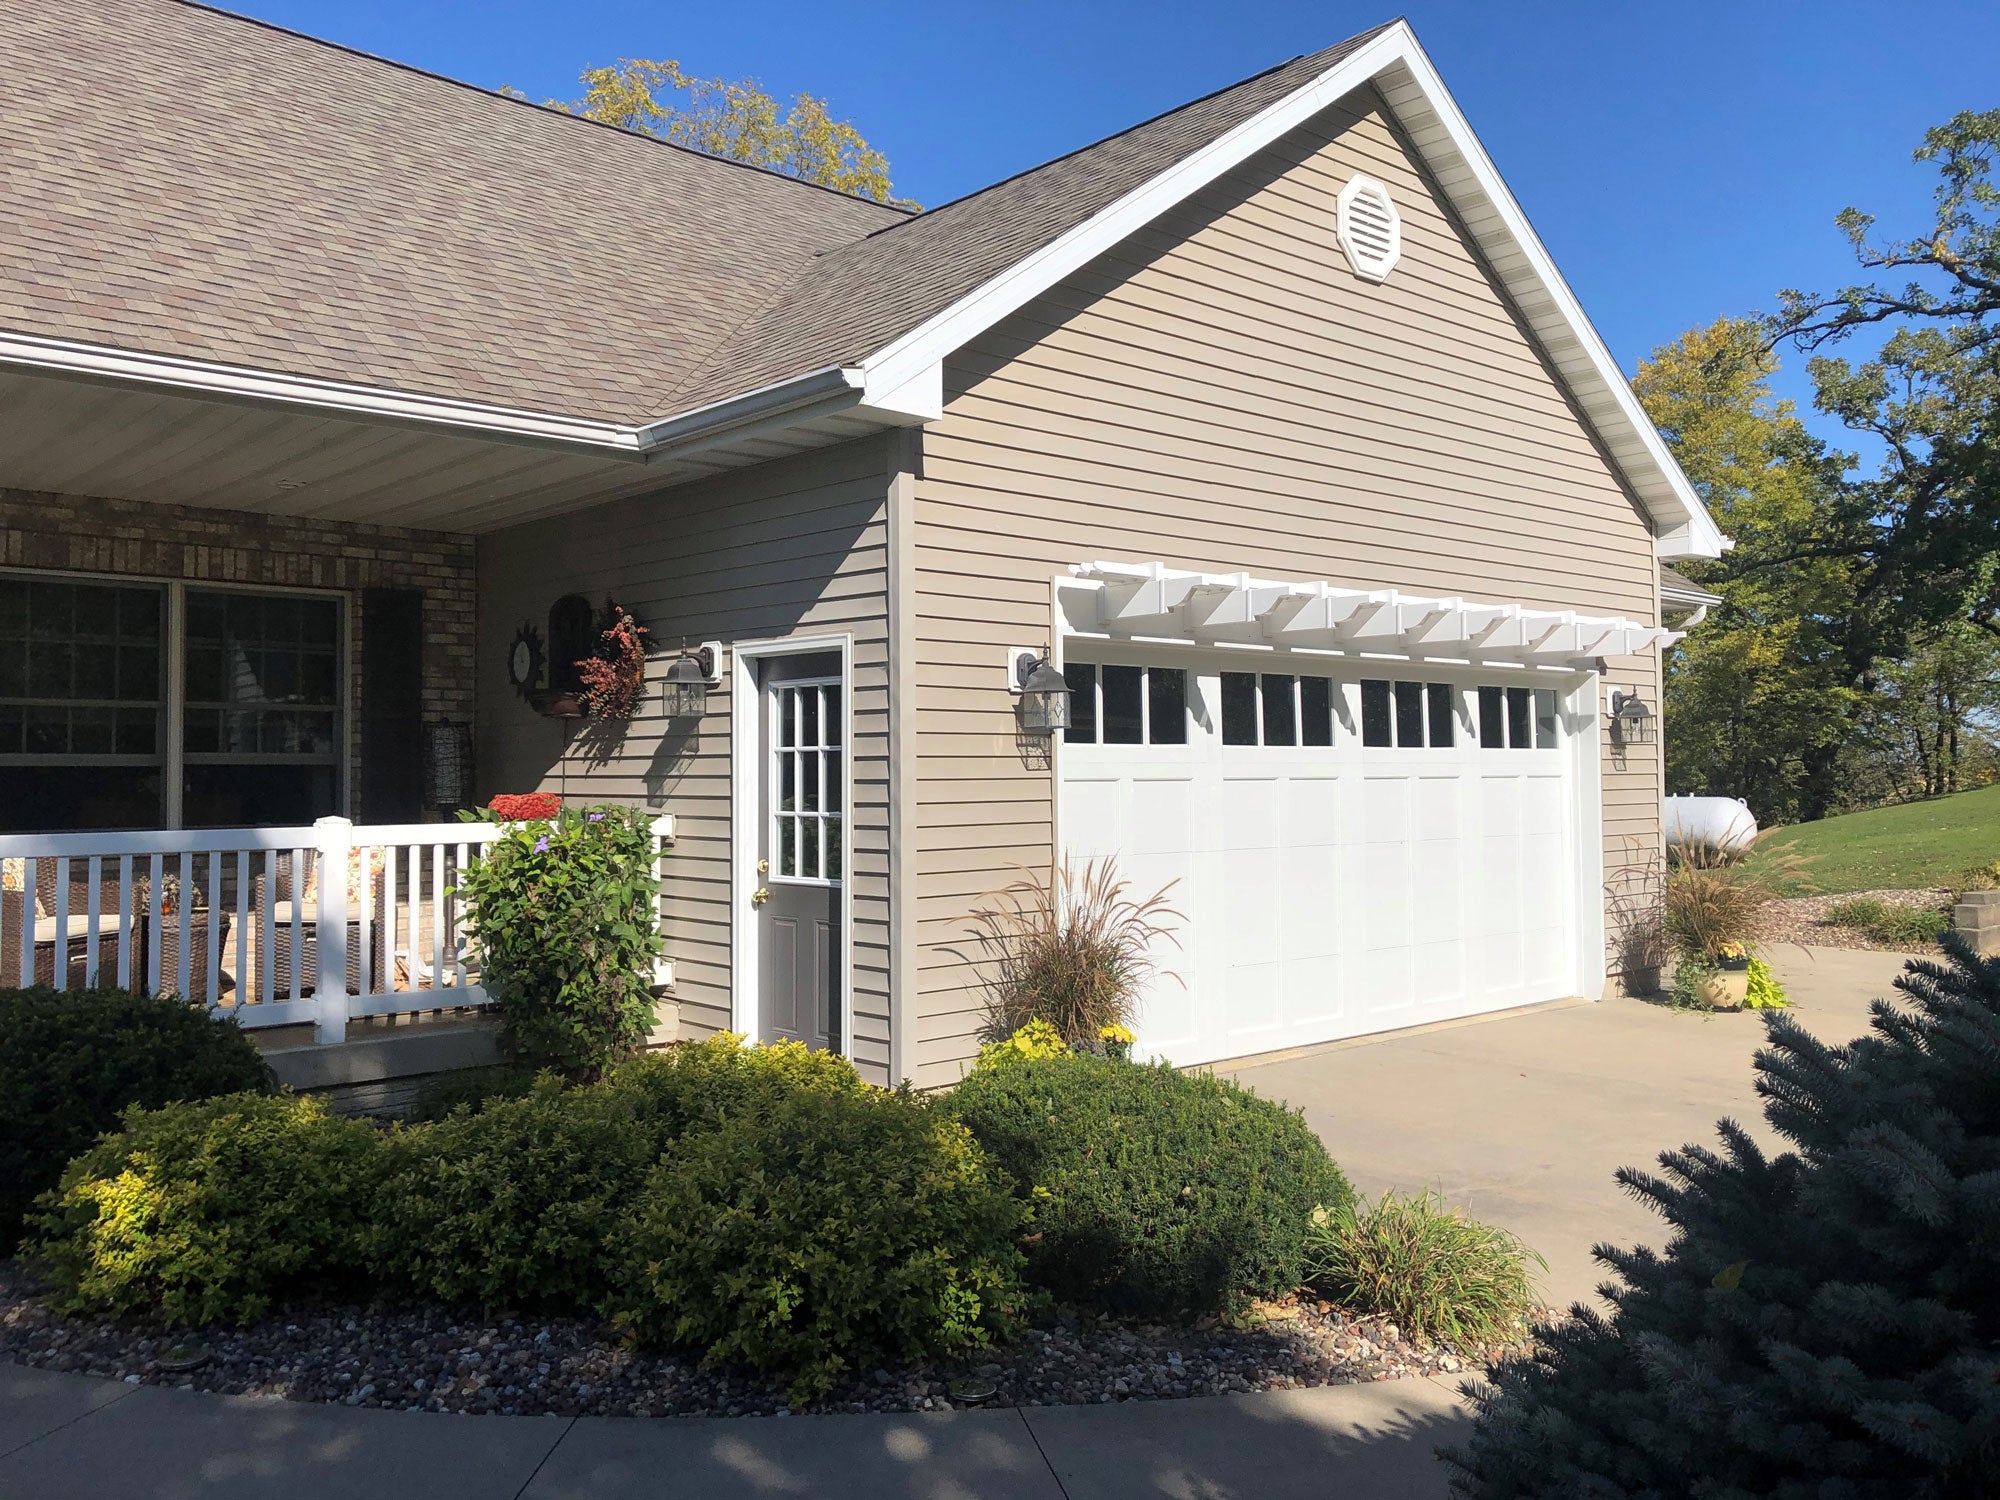 Sunset Pergola Kits offers eyebrow pergolas in 4-foot length increments from 4 feet through 60 feet.
That means the offered lengths are 4, 8, 12, 16, 20 feet, and so on, up to 60 feet.
If your ideal garage pergola length falls between those increments, the decision isn't simply whether to round up. You need to determine which neighboring size produces an acceptable appearance while remaining compatible with the measured wall space.
Suppose your preferred length is 14 feet.
The neighboring offered lengths are 12 and 16 feet.
Rather than assuming 16 feet is better because it exceeds your target, calculate how each option changes the margins and overall composition.
The following examples assume a centered pergola over a 10-foot-wide trim envelope:
| Offered Pergola Length | Difference From 10-Foot Trim Width | Margin on Each Side | Visual Implication |
|---|---|---|---|
| 8 feet | 2 feet shorter | 12 inches inside each trim edge | Creates a narrower accent rather than framing the entire trim envelope. |
| 12 feet | 2 feet longer | 12 inches beyond each trim edge | Frames the trim with moderate, balanced extensions. |
| 16 feet | 6 feet longer | 36 inches beyond each trim edge | Creates a substantially wider horizontal feature that requires more surrounding wall space. |
These figures describe visual geometry, not recommended clearances or guaranteed installation compatibility.
The table illustrates why the next larger increment isn't automatically the better choice. A 16-foot pergola might be appropriate for a broad architectural composition, but it could appear disproportionately long over a relatively narrow feature.
Before choosing a kit, establish three values:
For example, a homeowner might prefer 14 feet but decide that lengths from 12 to 15 feet would create acceptable proportions.
In that hypothetical situation, the offered 12-foot option falls within the acceptable range, while the 16-foot option does not.
The decision becomes straightforward without requiring an arbitrary rule to always round upward.
If neither neighboring increment falls within your acceptable range, reconsider the intended visual envelope or discuss the available sizing options before ordering. Do not assume an intermediate length or field trimming is available.
Before finalizing the selection, confirm exactly what the manufacturer's listed length represents.
For example, determine whether the stated length refers to the nominal kit size, a specific structural component, or the overall assembled width including any relevant extensions.
This distinction matters because your wall measurements and margin calculations must use the same dimensional reference as the product you are ordering.
Ask for the applicable dimensional diagram if the ordering terminology is unclear.
You can compare the available options in the Eyebrow Pergola Kits collection and review the eyebrow pergola product details before confirming a size.
After narrowing down the horizontal length, verify the pergola's other dimensions so you don't confuse its projection from the wall with the length you're selecting.
For Sunset Pergola Kits eyebrow pergolas, these are separate measurements.
The eyebrow pergola has a fixed rafter depth of 24 inches.
This describes the rafter dimension extending outward from the mounting wall. It is not the horizontal length of the pergola across the garage opening.
Changing from a 12-foot kit to a 16-foot kit changes the selected horizontal length, not the specified 24-inch rafter depth.
That distinction is important when comparing garage pergola dimensions because the product's length and outward projection serve different purposes.
Sunset Pergola Kits offers scrolled, beveled, and flat end-cap styles for its eyebrow pergolas.
The specified 24-inch rafter depth has an additional 9 inches associated with the scrolled or beveled end caps.
Accordingly, the rafter and decorative extension together account for 33 inches in that configuration.
Do not automatically apply that additional 9 inches to the flat-cap configuration. Confirm the actual assembled projection for the end-cap style you select.
Also verify whether the published horizontal kit length includes any relevant end or purlin extensions. The outward rafter projection and horizontal finished width should be checked independently against the manufacturer's dimensional information.
Before ordering, consolidate the measurements into one concise record.
Your summary should include:
Include a straight-on photograph of the wall with the relevant measurements labeled. A second photograph showing the broader exterior can help communicate how the proposed pergola should relate to the home's architecture.
For a sizing inquiry, indicate which dimensions are measured facts and which represent preferred design choices.
This makes it easier to evaluate the shortlisted lengths without confusing a desired appearance with a verified installation dimension.
Before placing the order, verify that the selected kit's published dimensions correspond to the horizontal length and projection used in your planning.
Confirm the relevant overall assembled dimensions, end-cap configuration, and any details necessary to establish that the kit fits the intended wall section.
The final horizontal sizing decision should be based on the actual assembled product, not an assumption about how nominal dimensions are measured.
Once you've established the appropriate length, you can address the separate question of vertical mounting position and clearance. That decision should be evaluated independently rather than using the horizontal proportions to determine mounting height.
The right eyebrow pergola size comes from matching the finished pergola to the architectural feature you want to accent—not automatically choosing the next length above the garage door's width.
Measure the opening and outer trim, identify the available wall space, establish your preferred left and right margins, and define an acceptable length range. Then compare the neighboring 4-foot increments and verify the manufacturer's assembled dimensions.
With those measurements in hand, you can browse eyebrow pergola kits and select a length that complements your home's architecture while fitting the intended installation area.
Measure both the garage opening and the outside-to-outside width of its surrounding trim. The outer trim is often the more useful visual reference when you want the eyebrow pergola to frame the complete architectural feature. Also measure the available wall space on each side before selecting a length.
Compare the neighboring available lengths against your preferred margins and maximum usable wall space. Sunset Pergola Kits offers eyebrow pergola kits in 4-foot increments from 4 to 60 feet. Choose the option that falls within your acceptable length range rather than automatically rounding up.
No. Equal margins often create a balanced appearance, especially around a centered opening, but they aren't mandatory. Nearby corners, windows, trim, and other architectural features may make an intentionally offset arrangement more attractive. Confirm that the selected position also meets the product's installation requirements.
Yes. An eyebrow pergola can accent a selected portion of a larger wall rather than spanning its entire width. The important consideration is whether its endpoints create a deliberate visual relationship with the opening, trim, or architectural feature beneath it.
No. Sunset Pergola Kits specifies a 24-inch rafter depth, with scrolled or beveled end caps adding another 9 inches. That produces a combined rafter and decorative extension of 33 inches. Confirm the assembled projection for the selected end-cap style, particularly when choosing flat caps.
Use the final intended trim dimensions when selecting the pergola length. If new trim hasn't been installed, obtain its finished outside-to-outside dimensions and mark them as planned measurements. Recheck the actual dimensions after installation before finalizing an order whenever possible.
Provide a straight-on photograph showing the opening, outer trim, nearby wall features, and available space on both sides. Label the measured widths, preferred pergola endpoints, and any potential obstructions. Include your target length, acceptable length range, and shortlisted kit sizes so the sizing question is clear.


