

MADE IN THE USA
with American products
w/ American products


Choosing the right attached pergola height can be surprisingly challenging when a home's eaves sit close above patio doors or windows. There may be enough wall space for an attractive pergola, yet too little vertical room for the roof assembly, door movement, and comfortable headroom. The solution is to measure the available space as one coordinated vertical envelope, then compare those measurements with the actual dimensions of the pergola configuration you're considering.
Before choosing a pergola height, establish the vertical space available between your finished walking surface and the obstacles above it. This includes more than measuring from the patio to the bottom of the gutter.
A useful starting point is a simple elevation sketch of the house wall and proposed pergola location. You don't need architectural drafting software. A measured drawing showing the important heights and relationships is enough to identify potential conflicts before selecting a kit.
 Use a clearly identified point on the finished patio as your reference elevation, or datum. Assign that point an elevation of zero and record other measurements relative to it.
For example, you might choose the finished patio surface directly beneath the proposed attachment area. If another portion of the patio is higher, record its elevation as a positive difference from that reference.
This matters because measurements taken upward from different surfaces cannot be compared directly. A gutter measured from the lawn and a doorway measured from the patio may appear to have compatible heights even when they do not.
If the patio hasn't been constructed yet, use its planned finished elevation rather than the current ground level.
Your elevation sketch should identify:
Record measurements in inches and identify where each was taken. Photographing the wall with the relevant dimensions marked can make later discussions with the pergola supplier or installer much easier.
Don't assume the available height is identical everywhere along the house.
Rooflines, soffits, exterior trim, and patio elevations may change. A pergola that fits comfortably at one end of the proposed attachment area could encounter an obstruction at the other.
Take measurements at both ends and at any intermediate location where an opening, roof-edge feature, or surface elevation changes the available space.
One of the most important distinctions in attached pergola planning is the difference between the structure's highest point and its lowest overhead component.
Top-of-structure height determines whether the pergola fits beneath or beside the home's roof-edge features. Usable headroom determines whether people can comfortably occupy the space underneath.
These measurements are related, but they aren't interchangeable.
The top of an attached pergola may include rafters, shade slats, or other components that extend above the primary supporting beam.
For a solid-roof patio cover, the roof assembly must also be considered. Its complete installed profile—not simply the supporting beam elevation—determines whether it conflicts with an eave or gutter.
The relevant measurement is the elevation of the highest component at the location where it approaches an overhead obstacle.
That location may differ from the attachment point or the top of a supporting post.
The lowest overhead element may be a beam, rafter, connection detail, decorative component, or installed accessory.
To determine usable headroom, subtract the downward projection of that component from its verified reference elevation, then compare the result with the finished walking surface directly below it.
For example, if a beam extends below the elevation used to position the roof assembly, measuring only to the top of that assembly would overstate the available headroom.
Before translating your measurements into a proposed installation height, obtain current drawings or specifications for the exact configuration under consideration.
Important dimensions may include:
Sunset Pergola Kits offers traditional and modern attached pergolas with fixed shade slats, as well as attached rainproof patio covers with solid polycarbonate roofs. Because these configurations have different assemblies, their vertical profiles should not be assumed to be identical.
Explore the available attached pergola configurations to identify potential candidates, then verify their actual vertical dimensions against your measurements.
A pergola can fit beneath the roofline and still interfere with how the home functions. That's why doors, windows, eaves, and gutters should appear on the same elevation sketch rather than being evaluated independently.
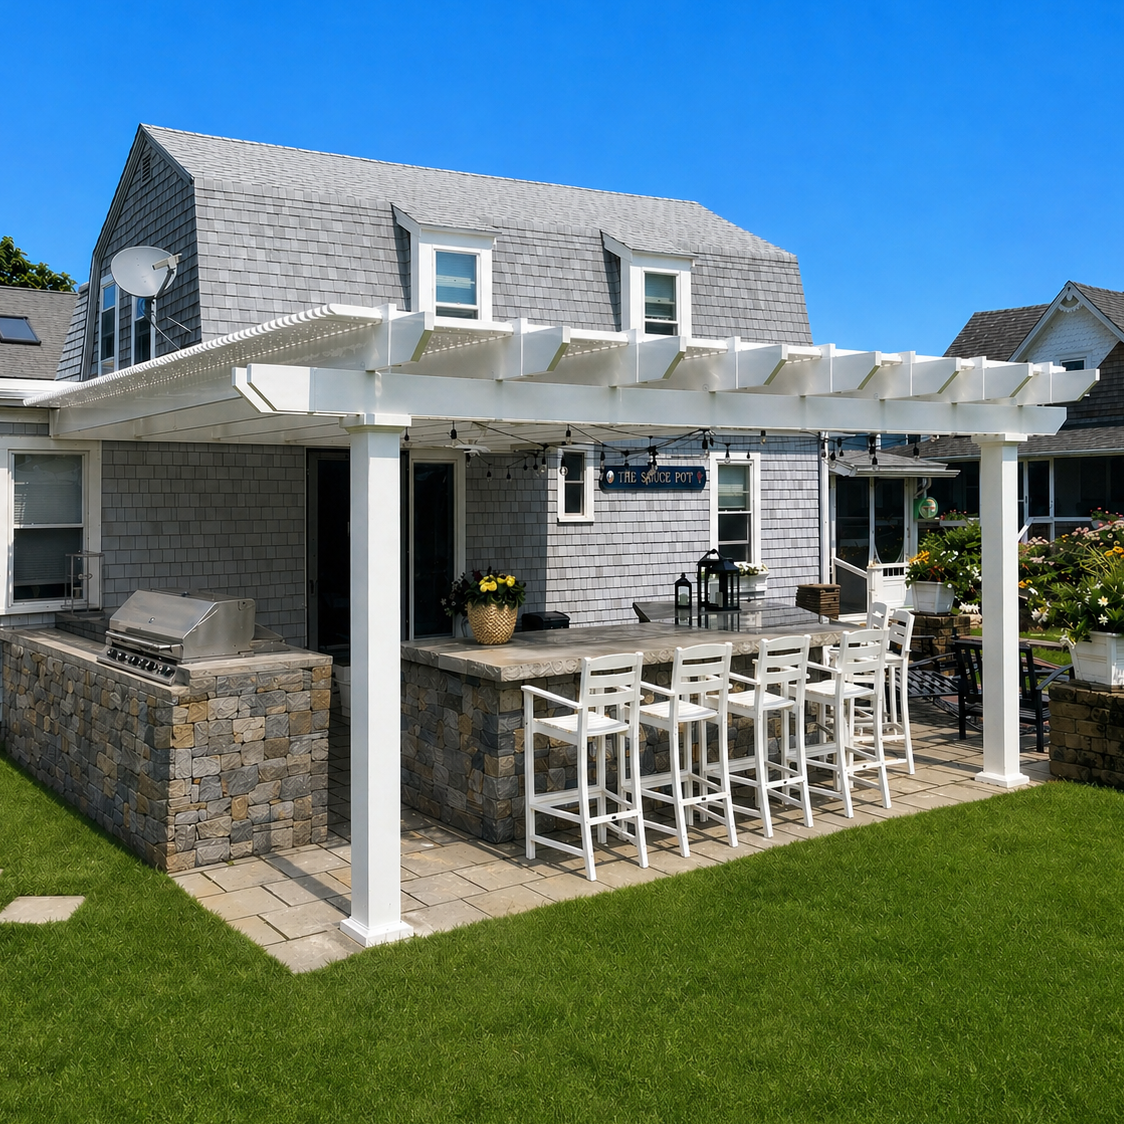 An attached pergola should not prevent an exterior door from operating normally.
For an outward-opening hinged door, record the highest point reached by the door panel, trim, and hardware throughout its swing. A door that clears the underside of a supporting beam may still contact a lower rafter, bracket, or other component elsewhere along its path.
Check the full opening movement rather than relying only on the height of the closed door.
Sliding doors generally don't swing outward, but their frames, exterior trim, and required access still need to be considered.
Where applicable, also account for storm doors and screen doors.
Windows introduce another consideration: the pergola's appearance from inside the house.
A supporting beam positioned across the middle of an important window may not physically interfere with the window, but it could interrupt a valued view.
Similarly, overhead shade slats may change the daylight reaching a room.
Before finalizing the elevation, stand inside the home and examine the proposed pergola location through the relevant windows. Consider the sightlines from normal seated and standing positions.
Mark important views on your elevation sketch so they can be considered alongside physical clearance requirements.
There may be a difference between the lowest height that technically fits and the height that produces the most pleasing result.
The roof edge often establishes the maximum practical elevation for an attached pergola.
Measure the underside of the eave or soffit and the lowest relevant portion of the gutter assembly. Also consider how far those elements project outward from the wall.
For example, a pergola component may sit below the gutter's bottom edge but still interfere with its projecting front profile.
The key question is whether the complete installed pergola assembly occupies any of the same space as the existing roof-edge features.
If avoiding the gutter would require relocating a downspout, changing service access, or modifying the roof-edge arrangement, resolve those issues separately before confirming the pergola elevation.
Do not assume that positioning a pergola immediately beneath a gutter is acceptable simply because the components do not visibly overlap. Installation requirements, maintenance access, and the selected connection details must also be verified.
After identifying the upper limits imposed by the house, evaluate the space beneath the pergola from the perspective of someone using the patio.
The relevant clearance is the vertical distance from the finished walking surface to the lowest overhead obstruction at each occupied location.
A patio that slopes away from the house may provide more headroom near its outer edge. A raised section, step, or elevated deck area may provide less.
Measure headroom at the highest relevant walking surface beneath each overhead component rather than assuming the entire patio has the same clearance.
For example, suppose the pergola's lowest beam remains at a constant elevation while the patio rises several inches toward one corner. Headroom beneath that beam decreases by the same amount at the raised location.
Pay particular attention to door approaches, circulation paths, seating areas, and locations where people will routinely stand.
If you intend to install new pavers, tile, decking, or another surface over the existing patio, include the proposed finished elevation in your measurements.
A surface improvement that raises the walking level reduces available headroom even though the pergola itself hasn't moved.
Planning around the finished condition avoids selecting a height that works today but becomes inconvenient after the patio is upgraded.
Ceiling fans and hanging light fixtures can establish additional clearance constraints.
 Sunset Pergola Kits offers optional fan mounts for traditional and modern pergolas and rainproof patio covers. However, the availability of a fan mount does not establish that a particular fan can be installed safely at your proposed pergola height.
Verify the fan manufacturer's required blade clearances, the selected fixture's dimensions, and any applicable local requirements before including the fixture in your design.
For lighting, account for the lowest point of the installed fixture rather than measuring only to its mounting location.
Electrical routing, controls, and installation should be coordinated separately. For this height-planning exercise, the immediate concern is how the proposed fixture affects usable clearance.
There is no single height recommendation that should automatically be applied to every attached pergola installation.
Required clearances may depend on the location, applicable building requirements, intended use, and installed accessories.
Confirm any applicable requirements with the appropriate local authority and use the selected product's installation specifications when determining the minimum acceptable height.
If the proposed assembly cannot provide the necessary clearance beneath the available roofline, that configuration may not be suitable for the location.
Once the important elevations are documented, you can translate them into a practical range of possible pergola heights.
The objective is to identify a height that satisfies two conditions simultaneously:
Instead of choosing a height first and hoping it works, calculate the limits imposed by the home and then determine whether an available kit configuration fits between them.
Consider a homeowner evaluating an attached pergola over an existing patio. The following numbers are hypothetical measurements used only to demonstrate the calculation—not recommended installation heights or manufacturer specifications.
| Measurement | Hypothetical Value | Planning Significance |
|---|---|---|
| Controlling overhead obstruction | 108 inches above reference datum | Establishes an upper boundary for the pergola assembly. |
| Required separation from that obstruction | 2 inches (hypothetical allowance) | Reduces the available upper elevation; actual requirements must be verified. |
| Roof assembly height above the selected installation reference | 8 inches (hypothetical component dimension) | Must be subtracted when determining the highest permissible installation reference elevation. |
| Lowest component below the installation reference | 6 inches (hypothetical component dimension) | Determines available headroom beneath that component. |
| Highest finished patio surface | 3 inches above reference datum | Reduces headroom at the controlling walking location. |
| Required usable headroom | 84 inches (hypothetical planning requirement) | Establishes the lower installation reference elevation; the actual requirement must be confirmed. |
For this simplified example, assume the relevant upper and lower components are positioned as described relative to the same installation reference, and that the controlling obstacles occur at the locations being evaluated.
Maximum installation reference elevation:
108 inches − 2 inches − 8 inches = 98 inches above the reference datum.
Minimum installation reference elevation:
84 inches of required headroom + 3 inches of patio elevation + 6 inches of downward component projection = 93 inches above the reference datum.
In this hypothetical scenario, the preliminary feasible installation reference elevation is therefore 93–98 inches above the chosen datum.
That is a five-inch range in which the proposed reference elevation could potentially fall, assuming all other clearance and attachment requirements are satisfied.
It is not a five-inch range of available post lengths, nor does it establish that a manufacturer offers a compatible kit height.
Suppose the minimum elevation needed for headroom is higher than the maximum elevation permitted beneath the roofline.
In that case, no height satisfies both constraints for the assumed component arrangement.
The appropriate response is to reconsider the proposed vertical placement, investigate a different compatible assembly profile, or determine whether another installation arrangement is feasible.
Don't simply eliminate necessary headroom or assume that a structural component can be modified to make the numbers work.
Likewise, moving the proposed attachment toward the fascia or roof edge to gain elevation introduces a separate structural question. A location that offers more vertical space is not automatically a suitable attachment point.
Two pergolas described using the same nominal height may have different amounts of usable headroom if their beams, rafters, and roof components occupy different vertical positions.
For that reason, compare the actual installed profiles of the configurations you're considering.
Sunset Pergola Kits offers both traditional pergola designs and modern pergola designs. Their visual styles differ, but the relevant question for a height-constrained installation is how each specific assembly fits within the measured envelope.
Do not assume that either style automatically provides more clearance without reviewing its dimensions.
A preliminary height range is useful, but it isn't sufficient to establish that a particular pergola kit will fit.
The final step is to prepare a concise vertical-fit brief and obtain confirmation of the proposed configuration's dimensions and installation requirements.
Provide the following information when evaluating an attached pergola:
A simple sketch accompanied by photographs and this information is often more useful than a single statement such as "I need an eight-foot-tall pergola."
Before ordering, ask the supplier or manufacturer to confirm:
Do not infer that post trimming, extensions, custom heights, or adjustable roof pitches are available simply because a pergola is offered in multiple sizes or configurations.
Any modification should be explicitly confirmed as compatible with the selected product and its installation requirements.
The most useful confirmation addresses the complete assembly—not merely the nominal post height.
It should establish that the selected configuration can be installed at the proposed elevation while preserving required separation from overhead obstacles, door operation, and usable clearance beneath the structure.
For homeowners comparing shade structures, the attached pergola collection provides a starting point for identifying configurations to evaluate against the completed measurements.
Once a candidate has been identified, resolve any remaining dimensional or modification questions before purchasing.
The right attached pergola height must accomplish more than fitting beneath the eaves. It should also preserve door operation, respect important window views, and provide appropriate headroom above the finished patio.
Start with a consistent elevation reference, identify the controlling upper and lower constraints, and calculate a preliminary height range. Then compare that range with verified dimensions and installation options for the exact pergola kit you're considering.
With those measurements documented, you can confidently narrow your choices among attached pergolas and seek confirmation of the configuration that best fits your home.
Use the finished patio as the reference for usable headroom. If you also measure elevations from the yard or another location, convert them to the same reference datum before comparing dimensions. The important measurement is the distance between the finished walking surface and the pergola's lowest overhead components.
Record the finished surface elevation at multiple locations, particularly beneath overhead components and along walking paths. Higher patio sections reduce available headroom. Use a common elevation reference so the changes are reflected accurately in your clearance calculations.
Yes. An outward-opening door may clear the main supporting beam but contact a rafter, connection component, or another lower element during its swing. Check the complete opening movement against the actual installed pergola profile.
Yes. If planned pavers, decking, tile, or other improvements will raise the finished walking surface, use that future elevation when evaluating headroom. Otherwise, the pergola may provide less clearance than expected after the improvements are completed.
Yes. A beam or roof component may fit without physically interfering with a window while still interrupting views or changing the daylight entering the room. Evaluate the proposed height from inside the home, particularly from frequently used seating areas.
No. An optional fan mount does not establish that a particular fan will have adequate clearance. Verify the selected fan manufacturer's requirements, the installed fan dimensions, the available headroom, and any applicable local requirements before finalizing the installation height.
Request current drawings or written dimensional confirmation for the exact configuration before ordering. Ask for the overall installed profile, beam and rafter positions, relevant connection dimensions, available heights, and permitted modifications. Do not estimate missing component dimensions or assume that posts can be shortened or extended.


